Introduction
Outreach is a Charity & Nonprofit Jekyll Theme, that is designed specifically for donation system, non-profit events, fund raising, crowdfunding campaigns for cause or charity group/organization , call for volunteers, vision and mission page, and many more.
Thank you for purchasing the theme. We provide support for all of our themes at https://support.thescube.com/, but please make sure you read this documentation in it’s entirety first. Thanks again!
Theme Installation
Installing The Theme
- Copy the theme files to your website directory.
- To run the theme locally, navigate to the theme directory in your terminal
- Run
bundle install to install the theme’s dependencies.
- Then run
jekyll serve or bundle exec jekyll serve to start the Jekyll server.
- If any error occurs click here to troubleshoot.
Plugins
Installed Plugins
- Jekyll Feed plugin: We used Jekyll Feed plugin to generate an Atom (RSS-like) feed of your Jekyll posts. Click here to see the plugin.
- Jekyll SEO Tag: We used Jekyll Feed plugin to add metadata tags for search engines and social networks to better index and display your site’s content. Click here to see the plugin.
- Jekyll Paginate V2: This plugin is used for pagination. It is responsible for reading the posts and collections in your site and split them correctly across multiple pages. Click here to see the plugin.
- Jekyll Archives: We used this plugin to generate post archives by tags and categories. Click here to see the plugin.
Note: Required Plugins are Mandatory. The theme will not work properly, if its not installed & activated.
Configuration Options Setup
We can make the Configuration Setup in _config.yml file.
Basic Settings
title: Outreach - Charity & Nonprofit Jekyll Theme
description: >-  # this means to ignore newlines until "baseurl:"
The theme is built on Jekyll and Bootsrap. It includes various modules and easily configurable settings to build your website on. Download Jekyll Theme as Static Site Generator.
- title: You can add your website title here.
- description: You can add a description about your website here.
Logo And Favicon Settings
This section has options to setup Logo & Favicon.
# Logo & Favicon Settings
logo: /assets/images/outreach/Group_3.png  # Use logo icon here
logo-width: 150px  # Use logo width here (default 150px)
favicon: /assets/images/siteicon.png  # Use favicon here
- logo: Add your logo to displays in the header section.
- logo-width: Add the width for the logo.
- favicon: Upload a favicon for the website.
Font Settings
This section has options to setup Font for your site.
Add the style sheet for your font here.
# Font settings
font:
- font-style-url: https://fonts.googleapis.com/css?family=Open+Sans&display=swap  # Use font url here.
- font-style-url: https://fonts.googleapis.com/css?family=Cardo&display=swap  # Use font url here.
- font-style-url: Add your font css here.
This section has options to setup the header navigation menu for your site.
# Header Settings
header-layout: header-1  # Use options header-1, header-2
header-widget: true  # Use options true or false
header-social-icon: true  # Use Options true or false
login-text:   # (used in header-1 layout)
login-url:   # (used in header-1 layout)
signup-text: Donate Now  # (used in header-1 layout)
signup-url: "#"  # (used in header-1 layout)
telephone: 0431-450112  # Use telephone number (used in header-2 layout)
email: info@example.com # Use email id (used in header-2 layout)
working-hours: 9 am to 5 pm # Use Working-hours (used in header-2 layout)
- header-layout: Use options header-1, header-2. Use header-1 here so the header version one is used for navigation menu. Use header-2 here so the header-2 is used for navigation menu. Without using this option navigation menu will not be displayed.
- header-widget: Use options true or false. This widget option is used in header-2. Set this to true so that header-2 will have widgets.
- header-social-icon: Use options true or false. This widget option is used in header-2. Set this to true so that the social icons will be displayed on the header-2.
- login-text: Text for the login url is entered here. This widget option is used in header-1.
- login-url: Url for the login is entered here.
- Signup-text: Text for the signup url is entered here. This widget option is used in header-1.
- Signup-url: Url for the signup is entered here
- telephone: Use telephone number for the site here. This widget option is used in header-2. This number will be used in telephone widget icon in header-2.
- email: Use email id for the site here. This widget option is used in header-2. This email id will be used in email widget icon in header-2.
- working-hours: Use working hours for the site here. This widget option is used in header-2. This will be displayed on header-2.
# Footer-columns
laptop: 4  # Use Options 1,2,3,4,6  Default: 3
tablet: 2  # Use Options 1,2,3,4 Default: 2
mobile: 1  # Use Options 1,2 Default: 1
- laptop: Number of columns for laptop devices can be used here.
- tablet: Number of columns for tablet devices can be used here.
- mobile: Number of columns for mobile devices can be used here.
Footer copyright credits can be used here
# Copyright Settings
copyright-content: true  # Use Options true or false
copyright-logo:  # Enter the copyright logo path
copyright-text: © 2020 Outreach. All Rights Reserved.  # Enter the copyright content for your website
copyright-social-icon: true  # Use Options true or false
- Copyright-content: It has two options (true or false). Set it to true to use copyright content. Set it to false copyright section will not be displayed.
- Copyright-logo: Site logo can be placed here so that it will be displayed on the copyright section.
- Copyright-text: Copyright text can be used here.
- Copyright-social-icon: It has two options (true or false). Setting true will display the copyright social medias
Post Settings
This section has settings for post options.
# Post Settings
# - Individual Post
post-layout: full-width  # Use options left-sidebar, right-sidebar, full-width
post-meta: true  # Use options true or false
social-share: true  # Use options true or false
social-share-type: type-1  # Use options type-1 or type-2
- post-layout: Use options left-sidebar, right-sidebar, full-width. This option can be overridden by using the post layout in post front matter.
- post-meta: Use options true or false.
- social-share: Use options true or false. This option is for social share options on the sidewidget section.
- social-share-type: There are two type in social share.
Collection
This section has setting for the collection.
#Collections
collections:
  causes:
    output: true
    permalink: /causes/:path/
    title: Causes
  events:
    output: true
    permalink: /events/:path/
    title: Events
- causes: Collection’s folder name
- output Output has two option true and false, enabling true will give the output perfectly.
- permalink: The permalink structure for the collection.
- title: Title for the collection.
This section has basic setting for the pagination.
# Pagination Settings
pagination:
  enabled: true  # Use options true or false
  per_page: 6  # Use number of post per page
  permalink: '/page/:num/'  # Use pagination permalink here
  title: ' - page :num'  # Use pagination title  here
  limit: 0  # Use pagination limit here
  sort_field: 'date'  # Use  sort_field options here
  sort_reverse: true  # Use options true or false
- enabled: Site-wide kill switch, disabled here it doesn’t run at all.
- per_page: How many objects per paginated page.
- permalink: The permalink structure for the paginated pages.
- title: Optional the title format for the paginated pages.
- limit: How many paginated pages to create.
- sort_field: Optional, defines the field that the posts should be sorted on.
- sort_reverse: Optional, sorts the posts in reverse order
Archive Settings
This section has basic setting for the Archive.
#Archive settings
jekyll-archives:
  enabled:
    - categories
  layout: archive
  permalinks:
    category: /category/:name/
- enabled: This option sets which types of archives will be created.
- layout: Sets the default layout to use.
- permalinks: Maps archive types to the permalink format used for archive pages.
- Outreach Header is created as an include, which is included in _layout > default.
- Use proper header version on config.yml file in header settings field.
- By default the theme use header-1.
- For header settings documentation click here.
- Outreach Header consists of 3 items: Logo/Site Title, Menu & Search form.

- Logo/Site Title: You can add logo and it’s width in _config.yml > Logo & Favicon Settings tab. Click here for more information.
- Menu: To add in header menu, _data > do-menu.yml. Click here for more information.
- Donate Now button: Donate now button is used for fund raising campaigns for causes.
- To create Menu, On jekyll go to _data > and right click on it and click’create a new file’ option.
- Enter the Menu name.
- Create an array under title menu and add the title, href and dropdowns.
# menu version 1.0.0
menu:
- title: Home  # Use header title here
  href: /  # Use header title url here
- title: Blog  # Use header title here
  href: /post-archive-thumbnail/   # Use header title url here
  megamenu: megamenu-5
- title: drop down  # Use header title url here
  href: "#" # Use header title url here
  option:
    - title: Item #  Use subdropdown title here
      href: "#"  # Use subdropdown url here
    - title: Item #  Use subdropdown title here
      href: "#"  # Use subdropdown url here
      option:
        - title: Item #  Use subdropdown title here
          href: "#"  # Use subdropdown url here
        - title: Item #  Use subdropdown title here
          href: "#"  # Use subdropdown url here
- title: title denotes menu’s name.
- href: href denotes links for title.
- options: Array of option defines the dropdown.
- title: title denotes dropdown’s menu name.
- href: href denotes links for dropdown’s title.
- options: Array of option defines the sub-dropdown.
- title: title denotes sub-dropdown’s menu name.
- href: href denotes links for sub-dropdown’s title.
- megamenu: This section displays a megamenu on the header section of the site.
This yml’s value will be used on {% include do-header-1.html %} and this do-header-1.html is included on the layout.
- Outreach Footer is created as an include, which is included in _layout > default.
- Include variable for footer is
{% include do-footer.html %}
- Outreach Footer consists of 4 items: Footer Widgets, Copyright links, Social Widgets and Copyright & Credit.

- Outreach supports 1 to 4 column Footer Widget layout.
- Click here to know how to add items for Footer Widgets section.
- The layout will resize based on how many widgets you use. If used more than 4 widgets, 3 column layout will be used.
Copyright Section
- Copyright section is added in _config.yml file.
- Click here to know how to activate copyright section.
- It also consist of copyright links, which can be added in footer.yml file
- Copyright links
footer-copyright:
- copyright-links:
    - title: Home  # Use footer-copyright links name here
      href: /  # Use footer-copyright links url here
- title: Title of the copyright link is used here.
- href: Url link of the copyright link is used here.
- To create Footer YML file, On jekyll go to _data > and right click on it and click’create a new file’ option. Enter the Menu name.
# footer version 1.0.0
footer:
- title: About Outreach  # Use footer title here
  option:
    - title: Lorem ipsum dolor sit amet, consectetur adipisicing elit, sed do eiusmod tempor incididunt.  # Use footer option links name here
      href:  # Use footer option url here
      icon:  # Use footer option icons here
    - title: abc@gmail.com  # Use footer option links name here
      href: mailto:abc@gmail.com  # Use footer option url here
      icon: <i class="far fa-envelope"></i>  # Use footer option icons here
    - title: 0987654321  # Use footer option links name here
      href: tel:0987654321  # Use footer option url here
      icon: <i class="fas fa-phone"></i>  # Use footer option icons here
- title: Quick Links  # Use footer title here
  option:
    - title: Blog  # Use footer option links name here
      href: /post-archive-thumbnail/  # Use footer option url here
      icon:  # Use footer option icons here
    - title: Documentation  # Use footer option links name here
      href: /documentation/  # Use footer option url here
      icon:  # Use footer option icons here
- title: title denotes menu’s name.
- options: Array of option defines the dropdown.
- title: title denotes dropdown’s menu name.
- href: href denotes links for dropdown’s title.
- icon: If you add an icon, it will displays before the title.
Collection Setup
- Collections are a great way to group related content like members of a team or talks at a conference.
- To use a Collection you first need to define it in your _config.yml. Click here
How to add content
- Create a corresponding folder e.g.
(<source>/_causes) or (<source>/_events) and add documents.
- Add the content in Front Matter.
Causes
layout: do-cause-layout
title: Fundraising Orphanages
categories: causes
image: /assets/images/4by3/portfolio-jekyll-theme.jpg
causes-date: 2020-02-28
donate-link: "#"
- layout: Layout for the causes collection.
- title: Title for the causes collection.
- categories: Categories for the causes collection.
- image: Image to display for causes.
- causes-date: Causes date is the final date for the causes. It is Mandatory
- donate-link: Donation link for the donate now button in causes.
Events
layout: do-event-layout
title: Annual Charity
company: events
categories: events
tags:
  - lorem
  - lorem
  - lorem
image: /assets/images/4by3/jekyll-github-pages-themes.jpg
location: Rise London. 41 Luke Street, London, EC2A 4DP
event-date: 2020-02-28
event-time: 02:30 PM - 04:00 PM
ticket-link: "#"
gradient-color: green
- layout: Layout for the event collection.
- title: Title for the event collection.
- categories: Categories for the event collection.
- tags: Tags for the event collection.
- image: Image to display for event.
- location: Location for the place of event.
- event-date: Date for the event when will it occurs. Events page uses calendar script for the filter the events according to the event date.
- event-time: Time of event.
- ticket-link: Link for the Get Ticket button.
- gradient-color: Gradient color for event date.
Includes
Login
Description
Login is an include form which consist of a user name and password, which can be embeded anywhere in the page for authentication purpose.
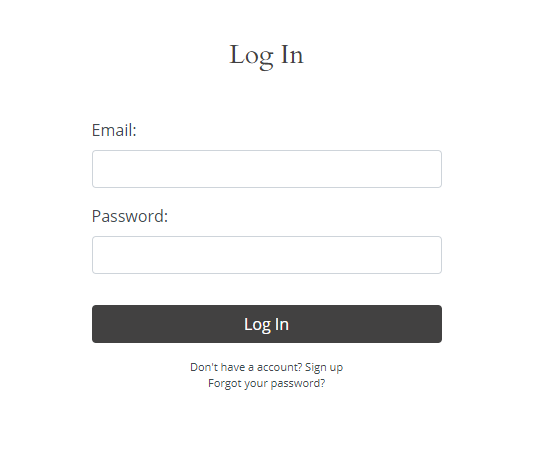
How to add on page
- It can be used by
{% include do-login.html %}
Signup
Description
Signup is an form which can be embeded as a user register form on any page.
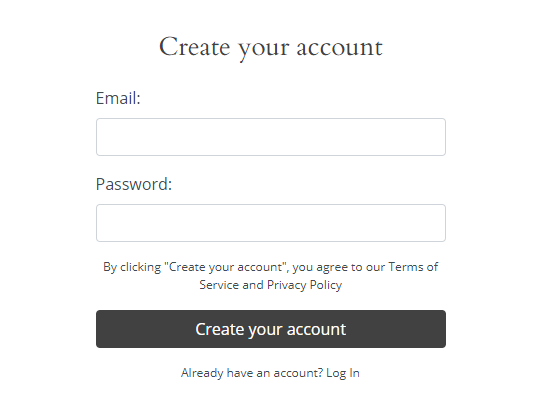
How to add in page
- It can be used by
{% include do-signup.html %}
Forgot Password
Description
Forgot Password is an form used to get a code incase of forgetting password for an existing user, which can be embeded anywhere in the page as include.
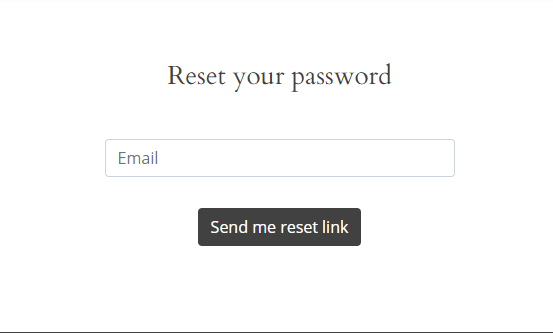
How to add on page
- It can be used by
{% include do-forgot-password.html %}
Call To Action
A call to action (CTA) is a prompt on a website that tells the user to take some specified action. A call to action is typically written as a command or action phrase, such as ‘Sign Up’ or ‘Buy Now’ and generally takes the form of a button or hyperlink. In digital marketing this can take the form of the text on a button (a CTA button) or a web link and in email campaigns CTAs are often links to a web page where the user can take further action.

Available Options
- Call to Action with button aligned right. (default)
- Call to Action with button aligned bottom.
- This is the default alignment for the call to action.
Code:
{% include do-call-to-action.html tag="modules" button-alignment="right" %}
How to add content
- Navigate to the data file for call to action in
_data > do-call-to-action.yml
- Add content to the data file as shown in the below example.
- title: Join the Static Site Generator/SSG revoloution by geting our jekyll theme  # Use call to action title here
  description:  # Use call to action description here
  button:
    - name: Buy Now  # Use call to action button name here
      href: "#"  # Use call to action url path here
  tag: modules # Use call to action tag here
- In the data file tag is a mandatory value. Without using tag call to action will not be displayed.
How to add in page:
Carousel
Description
- Carousel is a block which continues slides number of content used in it. In this site we have used carousel to slide pet images infinitely.

How to add content
- Carousel content can be added in _data > do-carousel.yml
- title:  # Use carousel title name here
  image: /assets/images/hero/jekyll-charity-theme.jpg  # Use carousel image here
  description:  # Use carousel description here
  button-text:  # Use button text here
  href: "#" # Use carousel href here
  tags: home  # Use carousel tag name here

- title:  # Use carousel title name here
  image: /assets/images/hero/jamstack-charity-theme.jpg  # Use carousel image here
  description:  # Use carousel description here
  button-text:  # Use button text here
  href: "#" # Use carousel href here
  tags: home  # Use carousel tag name here
- image: Add image url for the carousel here.
- tags: Enter carousel the tags name here.
How to add in page
- It can be used by
{% include do-carousel.html id="one" tag="home" %}
- id: Use a unique id for the carousel.
- tag: Use the tag for the carousel as include variable.
Description
Form is an html block which provides the user to contact the owner of the site with its available elements. This form is just a example one which you can embed on your site.
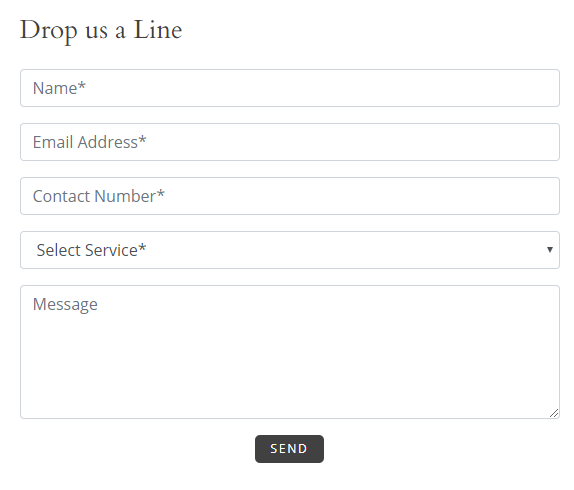
How to add on page
- It can be used by
{% include do-form.html %}
Hero Content
Hero Content contains two columns one with image and other with text.
Available Options
- Hero content image left and content right.
- Hero content image right and content left.
- Hero content mobile image order.
How to add content
- Navigate to the data file for Hero content in _data > do-hero-content.yml
- Add content to the data file as shown in the below example.
- title: Drive impact faster and with confidence  # Use hero-content title here
  description: Lorem ipsum dolor sit amet, consectetur adipisicing elit, sed do eiusmod tempor incididunt ut labore et dolore magna aliqua. Ut enim ad minim veniam, quis nostrud exercitation ullamco laboris nisi ut aliquip ex ea commodo consequat. Duis aute irure dolor in reprehenderit in voluptate velit esse cillum dolore eu fugiat nulla pariatur. Excepteur sint occaecat cupidatat non proident, sunt in culpa qui officia deserunt mollit anim id est laborum.  # Use hero-content description here
  image: /assets/images/platform/platform_module3.png  # Use hero-content image path here
  button:
    - button-name: read more  # Use hero-content button name here
      button-href: "#" # Use hero-content url path here
      icon-button-name: Learn More  # Use hero-content icon-button name here
      icon-button-href: "#"  # Use hero-content icon-button-url path here
  tag: samples  # Use hero-content tag here
- In the data file tag is a mandatory value. Without using tag Hero content will not be displayed.
How to add in page
Description
Pagination is the sequence of numbers assigned to pages in a book. Each page can have multiple articles.
Inorder to use pagination, Enable pagination in _config.yml. Click here for more information.

How to add on page
- It should be added on page’s front matter.
pagination:
enabled: true
per_page: 8
category:
trail:
  before: 1 # The number of links before the current page
  after: 1  # The number of links after the current page
- enabled: Page kill switch, disabled here it doesn’t run this page. Enabled to use pagination.
- per_page: How many objects per paginated page.
- category: Pagination will obatain post based on the provided category.
- trail: Trail will show the links before and after the current page
- before: The number of links before the current page
- after: The number of links after the current page
Page Title
Description
- Page Title displays a title, description and a button with link.

How to add content
- Navigate to the front matter of the page where the page title is included.
- Add content to the front matter as shown in the below example.
page-title:
  - enabled: true
    custom-title: Contact
    description: Habitant morbi tristique senectus et netus. Semper viverra nam libero justo laoreet sit amet. Sit amet massa vitae tortor condimentum lacinia quis vel eros.
    button-text:
    button-link:
    background-color:
    background-image: /assets/images/contact-banner-1.jpg
- enabled: In the front matter enabled options is set to be true. Without setting enabled as true page title section will not be displayed.
- custom-title: Custom title attribute can be used for setting page title’s title.
- description: Description attribute can be used for setting page title’s description
- background-color: In the front matter background-color attribute can be used for setting page title section background color.
- background-image: In the front matter background-image attribute can be used for setting page title section background image.
How to add in page
- Add page title to the page using the include statement.
- On the page use
{% include do-page-title.html %}`
- Add the data to the front matter of the page. Without adding data page title will not be displayed.
Post Archive Grid
This section displays a list of archive for blog post on the site in a grid style.
Code:
{% include do-post-archive-grid.html columns="3" %}
How to add content
- Navigate to the front matter of the page where post archive grid is included.
- Add content to the front matter as shown in the below example.
pagination:
  enabled: true
  per_page: 8
  category:
  tags:
  trail:
    before: 1 # The number of links before the current page
    after: 1  # The number of links after the current page
- In the front matter under the pagination array enabled should be true and it is a mandatory value. Without enabling pagination post archive grid will not be displayed.
- In the front matter under the pagination array per_page is used for number of blog post per page to be displayed.
- In the front matter under the pagination array category is used for defining which post category should be displayed. similarly tags can also be used.
How to add in page
- Enable pagination on the config.yml file as shown below.
# Pagination Settings
pagination:
enabled: true  # Use options true or false
per_page: 6  # Use number of post per page
permalink: '/page/:num/'  # Use pagination permalink here
title: ' - page :num'  # Use pagination title  here
limit: 0  # Use pagination limit here
sort_field: 'date'  # Use  sort_field options here
sort_reverse: true  # Use options true or false
- Add post archive grid to the page using the include statement.
- On the page use
{% include do-post-archive-grid.html columns="3" %}
- Attributes:
- columns:
- 4, 3 columns. default 3 columns.
Post Archive Masonry
This section displays a list of archive for blog post on the site in a masonry style.
Code:
{% include do-post-archive-masonry.html%}
How to add content
- Navigate to the front matter of the page where post archive masonry is included.
- Add content to the front matter as shown in the below example.
pagination:
enabled: true
per_page: 8
category:
tags:
trail:
  before: 1 # The number of links before the current page
  after: 1  # The number of links after the current page
- In the front matter under the pagination array enabled should be true and it is a mandatory value. Without enabling pagination post archive masonry will not be displayed.
- In the front matter under the pagination array per_page is used for number of blog post per page to be displayed.
- In the front matter under the pagination array category is used for defining which post category should be displayed. similarly tags can also be used.
How to add in page
- Enable pagination on the config.yml file as shown below.
# Pagination Settings
pagination:
enabled: true  # Use options true or false
per_page: 6  # Use number of post per page
permalink: '/page/:num/'  # Use pagination permalink here
title: ' - page :num'  # Use pagination title  here
limit: 0  # Use pagination limit here
sort_field: 'date'  # Use  sort_field options here
sort_reverse: true  # Use options true or false
- Add post archive masonry to the page using the include statement.
- On the page use
{% include do-post-archive-masonry.html%}
Post Archive Thumbnail
This section displays a list of archive for blog post on the site in a thumbnail style.
Code:
{% include do-post-archive-thumbnail.html%}
How to add content
Description
This section displays a variety of information to the right or left side of web page.
- Options are available in _data > do-side-widget.yml
# side-widget version 1.0.0
side-widget:
  - recent-post: false  # Use true or false
    title: Marketing  # Use side-widget title here
    content: Lorem ipsum dolor sit amet, consectetur adipisicing elit, sed do eiusmod tempor incididunt ut labore et dolore magna aliqua. Ut enim ad minim veniam, quis nostrud exercitation ullamco laboris nisi ut aliquip ex ea commodo consequat. Duis aute irure dolor in reprehenderit in voluptate velit esse cillum dolore eu fugiat nulla pariatur. Excepteur sint occaecat cupidatat non proident, sunt in culpa qui officia deserunt mollit anim id est laborum.  # Use side-widget content here
    image: /assets/images/sample.jpg  # Use side-widget image here
    image-alt: dummy  # Use side-widget image-alt here
    nav:  # Use side-widget nav name here
    megamenu:  # Use side-widget megamenu-type here
    newsletter: true  # Use true or false
    post-categories: true # Use true or false
    slab-text: true # Use true or false
    slab-text-content:  # This is the array for slab text
      - text: YOU CAN HELP  #  Use slab text line 1 here
      - text: SAVE  # Use slab text line 2 here
      - text: A LIFE  # Use slab text line 2 here
    testimonial: true  # Use true or false
    testimonial-title: Testimonial Card  # Use testimonial title here
    testimonial-content: This is a testimonial widget that will put a neat little notecard in your sidebar. Awesome!  # Use testimonial content her
    testimonial-name: Shovan  # Use testimonial name here
    testimonial-link-name: SCube Theme  # Use testimonial link name here
    testimonial-link-url: https://theme.scube.co/ # Use testmonial link url here
    widget-hours: false # Use true or false
    location-iframe:   # Use location iframe map here
    location: # Use business locaion here
    business-hours-monday: "9:00 am - 8:00 pm" #  Use business time for the day here
    business-hours-tuesday: "9:00 am - 8:00 pm" #  Use business time for the day here
    business-hours-wednesday: "9:00 am - 8:00 pm" #  Use business time for the day here
    business-hours-thursday: "9:00 am - 8:00 pm"  #  Use business time for the day here
    business-hours-friday: "9:00 am - 8:00 pm" #  Use business time for the day here
    business-hours-saturday: "10:00 am - 12:00 pm" #  Use business time for the day here
    business-hours-sunday: Closed #  Use business time for the day here
- recent-post: Use true or false.
- title: Use side-widget title here.
- content: Use side-widget content here.
- image: Use side-widget image here.
- image-alt: Use side-widget image-alt here
- nav: Use side-widget nav name here.
- megamenu: Use side-widget megamenu-type here.
- newsletter: Use true or false
- post-categories: Use true or false
- slab-text: Use true or false
- slab-text-content: This is the array for slab text
- text: Use slab text line 1 here
- testimonial: Use true or false
- testimonial-title: Use testimonial title here
- testimonial-content: Use testimonial content her
- testimonial-name: Use testimonial name here
- testimonial-link-name: Use testimonial link name here
- testimonial-link-url: Use testmonial link url here
- widget-hours: Use true or false
- location-iframe: Use location iframe map here
- location: Use business locaion here
- business-hours-monday: Use business time for the day here
- business-hours-tuesday: Use business time for the day here
- business-hours-wednesday: Use business time for the day here
- business-hours-thursday: Use business time for the day here
- business-hours-friday: Use business time for the day here
- business-hours-saturday: Use business time for the day here
- business-hours-sunday: Use business time for the day here
How to add in page
- It can be used by
{% include do-side-widget.html %}
- It has been used on page for various layouts on this theme.
This section contains the list of social media share button with its icons which can be embedded on to the site.

Available Options
- Social share buttons type-1.
- Social share buttons type-2.
How to add in page
- Navigate to the config file in _config.yml
- under post settings section use “type-1” for “social-share-type” as shown below.
# Post Settings
social-share-type: type-1  # Use options type-1 or type-2
- On the page use
{% include do-social-share-buttons.html %}
Title
This section displays a title, description, a button with link and a bottom image section.
Code:
{% include do-title.html tag="thumbnail" %}
How to add content
- Navigate to the data file for title in _data > do-title.yml
- Add content to the data file as shown in the below example.
```yml
- custom-title: Post Archive Thumbnail # Use page-title title here
description: # Use page-title description here
button-text: # Use page-title button-text here
button-link: # Use page-title button-link here
bottom-image: # Use page-title bottom-image here
tags: thumbnail # Use page-title tag here
```
- In the data file tags is a mandatory value. Without using tags title will not be displayed.
How to add in page
- Add title to the page using the include statement.
- On the page use
{% include do-title.html tag="thumbnail" %}
- Attributes:
- Tag: Tag is a mandatory attribute without using tag title will not be displayed. (Mandatory)
- Class: Use additional class here as include variable.
Jekyll file directory
Note: To work with jekyll you should have a clear knowledge with jekyll directories and files.
- A jekyll site consist of these following directories and files.
- Jekyll directories
- _data
- _includes
- _layouts
- _posts
- _sass
- _site
- assets
- Jekyll files
- _config.yml
- Gemfile
- Gemfile.lock
Jekyll Directories
- _data
- Well-formatted site data should be placed here. The Jekyll engine will autoload all data files (using either the .yml, .yaml, .json, .csv or .tsv formats and extensions) in this directory, and they will be accessible via site.data. If there’s a file menu.yml under this directory, then you can access contents of the file through site.data.menu.
- In order work with this directory you should have a clear knowledge with .yml, .yaml, .json, .csv, .tsv
- _includes
- These are the partials that can be mixed and matched by your layouts and posts to facilitate reuse. The liquid tag
{% include header.html %} can be used to include the partial in _includes/header.html
Includes are very useful and it completly removes code redundancy.
With includes one can create a file once and use anywhere without repeating the same blocks of codes.
- _layouts
- These are the templates that wrap posts and pages. Layouts are chosen on a post-by-post and page-by-page basis in the front matter. The liquid tag
{{ content }} is used to inject content into the web page.
- In this theme we have used several layouts for different page structures and post individuals structures.
- Front Matter
- Any file that contains a YAML front matter block will be processed by Jekyll as a special file. The front matter must be the first thing in the file and must take the form of valid YAML set between triple-dashed lines. Here is a basic example:
---
layout: default
title: Home
---
- _posts
- Your dynamic content, so to speak. The naming convention of these files is important, and must follow the format: YEAR-MONTH-DAY-title.MARKUP. The permalinks can be customized for each post, but the date and markup language are determined solely by the file name.
- Your post can be organized by directories as categories or tags.
- These tags, categories and all post values can be provided through post front matter and are displayed with their layouts.
- Permalinks
- Permalinks are the output path for your pages, posts, or collections. They allow you to structure the directories of your source code different from the directories in your output.
- _sass
- These are sass partials that can be imported into your main.scss which will then be processed into a single stylesheet main.css that defines the styles to be used by your site.
- All css packages can be combined into a package with this sass directory.
- _site
- This is where the generated site will be placed (by default) once Jekyll is done transforming it.
- assets
- Assets directory consist of all the css, js, images and other packages for your site.
- Click here for more information.
Jekyll Files
- _config.yml
- Stores configuration data. Many of these options can be specified from the command line executable but it’s easier to specify them here so you don’t have to remember them.
- Jekyll gives you a lot of flexibility to customize how it builds your site. These options can either be specified in a _config.yml or _config.toml file placed in your site’s root directory, or can be specified as flags for the jekyll executable in the terminal.
- Gemfile
- A Gem is a bundle of code we can include in Ruby projects. This allows us to take someone else’s code and drop it into our own project.
- Jekyll itself is a Gem as well many Jekyll plugins including jekyll-feed, jekyll-pagination, jekyll-seo-tag and jekyll-archives.
- A Gemfile is Ruby’s dependency management system or in other words, a list of Gems a Ruby project needs to run. We use Gemfiles on Jekyll sites when we have Jekyll plugins.
- A Gemfile requires at least one source which tells us where to download the Gems. Unless we have an advanced use case rubygems.org will be fine.
- Next we specify the Gems we’re using. We can include a version number if want a specific version. It’s important to always include Jekyll in our Gemfile.
- Usually we’d have to also specify our plugin Gems in _config.yml so Jekyll knows about them. We can avoid this by putting our plugin Gems in a “jekyll_plugins” group which Jekyll includes automatically.
- Gemfile.lock
- When we create or change a Gemfile, we need to run bundle install which performs two tasks:
- Creates a Gemfile.lock file if it doesn’t exist. This file is auto-generated and includes all the Gems in Gemfile with the addition of a version number even if it wasn’t specified. This ensures that other people we share the source code to will have the same version of the gems.
- Downloads the gems in Gemfile.lock.
- Usually when we run jekyll we’d do something like this:
- jekyll serve
- When we’re using a Gemfile we need to run Jekyll slightly differently. We might have multiple versions of the jekyll-feed plugin on our machine and if we run jekyll serve, it might use the wrong version. We can solve this using bundle exec which makes only the Gems in the Gemfile available. For example if we want to run jekyll serve we’d run:
- bundle exec jekyll serve
- Click here for more details
Troubleshoot
- After downloading the package we have run ‘jekyll serve’ on the terminal to run jekyll server.
- If you found any errors or bugs run ‘bundle install’ to update missing gems for jekyll.
- After doing ‘bundle install’ it will install all the dependency for the jekyll.
- Try ‘jekyll serve’ to run the jekyll server. If any error occurs in dependency files try ‘bundle exec jekyll serve’.
- It will fix the dependencies and run the server.


